Using the Serial Monitor tool
Learn how to use the new Serial Monitor tool in the Arduino IDE 2, and how it works differently from older versions.
The Serial Monitor is an essential tool when creating projects with Arduino. It can be used as a debugging tool, testing out concepts or to communicate directly with the Arduino board.
The Arduino IDE 2 has the Serial Monitor tool integrated with the editor, which means that no external window is opened when using the Serial Monitor. This means that you can have multiple windows open, each with its own Serial Monitor.
You can download the editor from the Arduino Software page.
You can also follow the downloading and installing the Arduino IDE 2 tutorial for more detailed guide on how to install the editor.
Requirements
- Arduino IDE 2 installed.
- Arduino board.
- Board package installed for the board used.
Notable Changes
Integrated Monitor
One major change that was introduced with the Arduino IDE 2 is the integrated Serial Monitor. The older versions of the editor features an external window that matches the port/board that we select.
The Arduino IDE 2 works a bit differently. Instead of opening an external window for the Serial Monitor, it shows up where the console log is located, as an additional tab. To understand how this works, let's take a look at how the old editor works:
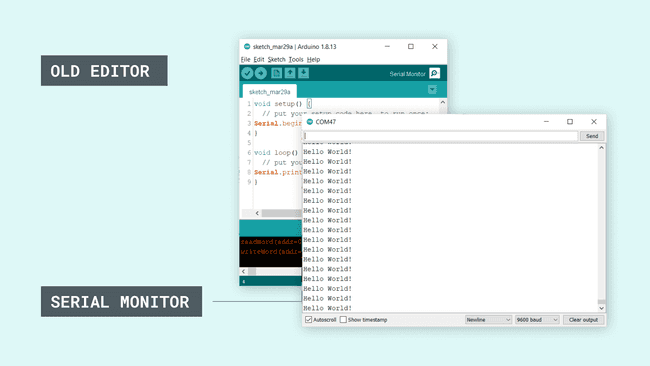
Now, let's take a look at the IDE 2. Notice how the Serial Monitor is located at the bottom of the editor:
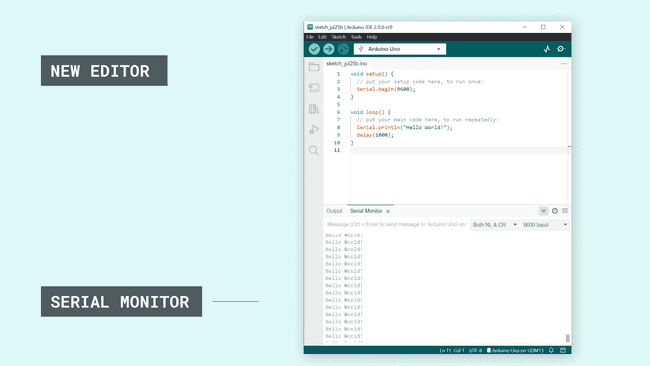
The Serial Monitor settings are also located here, such as adjusting the baud rate and sending messages.
Advantages
A major advantage with having the Serial Monitor integrated with the editor is the possibility to have multiple monitors open simultaneously. In the old editor, when changing the port/board, it changed across all windows. In addition, we were limited to one Serial Monitor window, an obstacle that the IDE 2 removes.
You will find an example with more information on how to use this feature, further down this tutorial under the Using multiple Serial Monitors simultaneously section.
Using the Serial Monitor Tool
The Serial Monitor tool is a really great tool for debugging and establishing communication between a computer and an Arduino. To use it is really easy, but there are some things that we need to do first.
1. First we need to open the Arduino IDE 2.
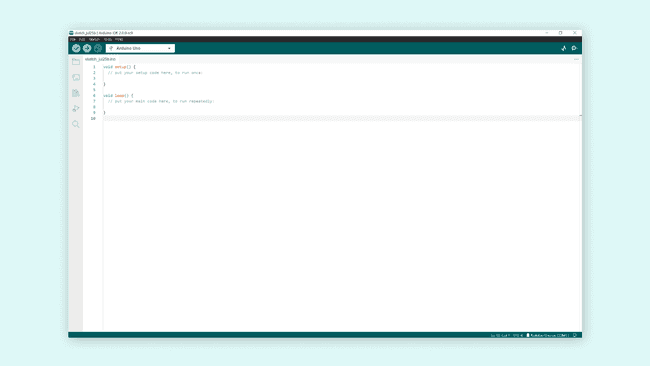
2. Now, we need to create a sketch that includes some configurations needed, so that our board can communicate with our computer. Mainly, we need to set a baud rate, which is done by writing
Serial.begin(9600);96001void setup() {2Serial.begin(9600);3}4
5void loop() {6Serial.println("Hello world!");7delay(1000); 8}3. This will print
"Hello world!"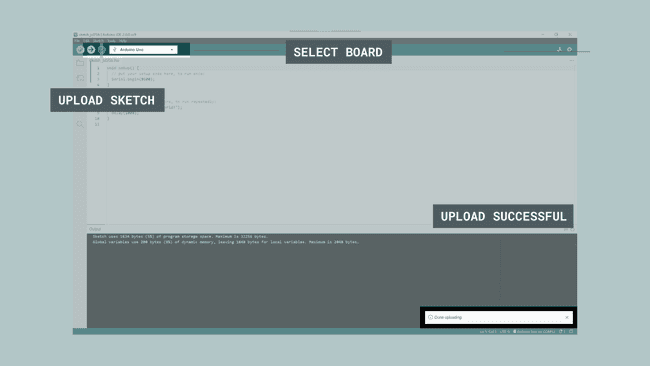
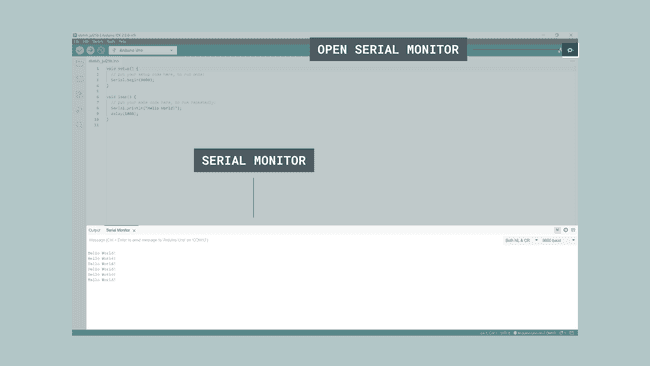
4. When it has finished uploading, click on the Serial Monitor button, located at the top right corner of the IDE. This will launch the Serial Monitor in the bottom of the IDE, replacing the console section.
The text
"Hello world!"Using Multiple Serial Monitors Simultaneously
A really cool feature with the Arduino IDE 2 is that the Serial Monitor is linked to the sketch windows you have open. For example, if we have two sketch windows, named sketch_1 and sketch_2, we can select the port and board for each window, and have two Serial Monitors running at the same time.
This is really useful when working with various communication / connectivity projects, where we want to know what's going on both boards at the same time. If you have two Arduino boards, you can try out this feature using the instructions below.
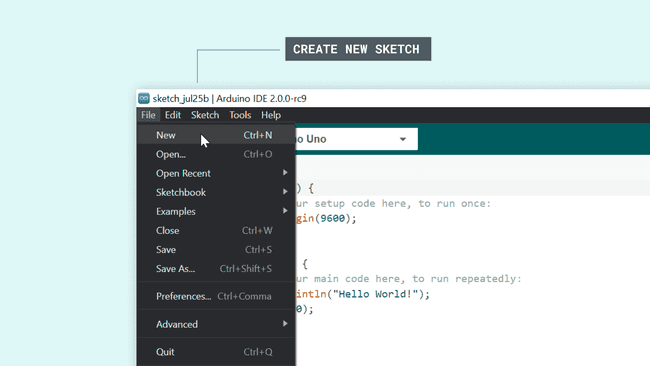
1. First, we need to open a new file, through File > New.
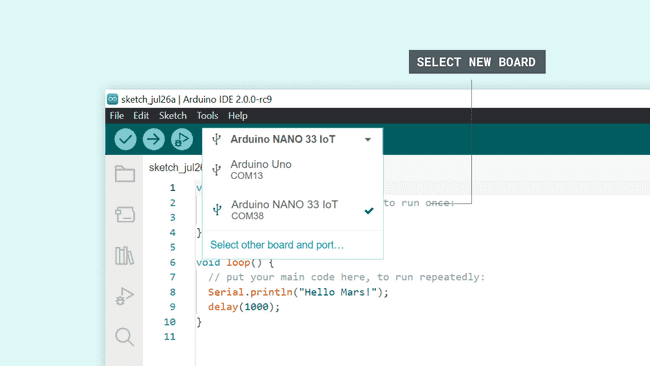
2. Now, we need to choose another board. In this example, we are using an Arduino Nano 33 IoT. If you have connected it to your computer and installed the necessary board package for it, it will show up in the board list.
3. For the new sketch, let's use the same sketch we uploaded to the other board, but replace the
"Hello world!""Hello Mars!"1void setup() {2Serial.begin(9600);3}4
5void loop() {6Serial.println("Hello Mars!");7delay(1000); 8}4. Upload the code to the board, and open the Serial Monitor. We should now see
"Hello Mars!"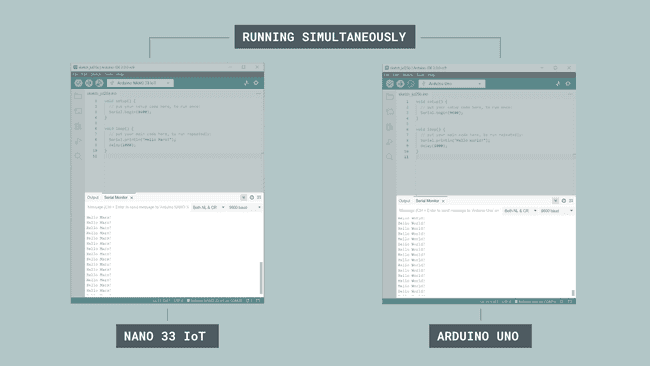
Congratulations, you can now check what is going on with two boards simultaneously!
Note: Using several sketch windows and Serial Monitor at the same time can be quite heavy on your machine.
More Tutorials
You can find more tutorials in the Arduino IDE 2 documentation page.
Suggest changes
The content on docs.arduino.cc is facilitated through a public GitHub repository. If you see anything wrong, you can edit this page here.
License
The Arduino documentation is licensed under the Creative Commons Attribution-Share Alike 4.0 license.